Smoker Upgrade!
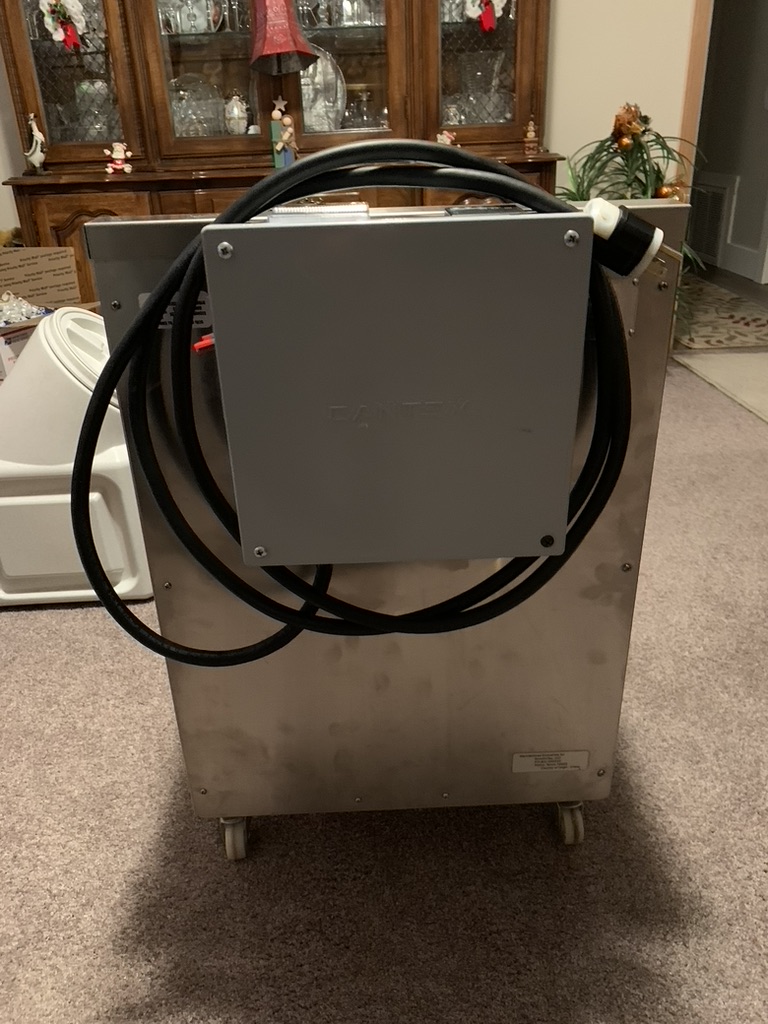
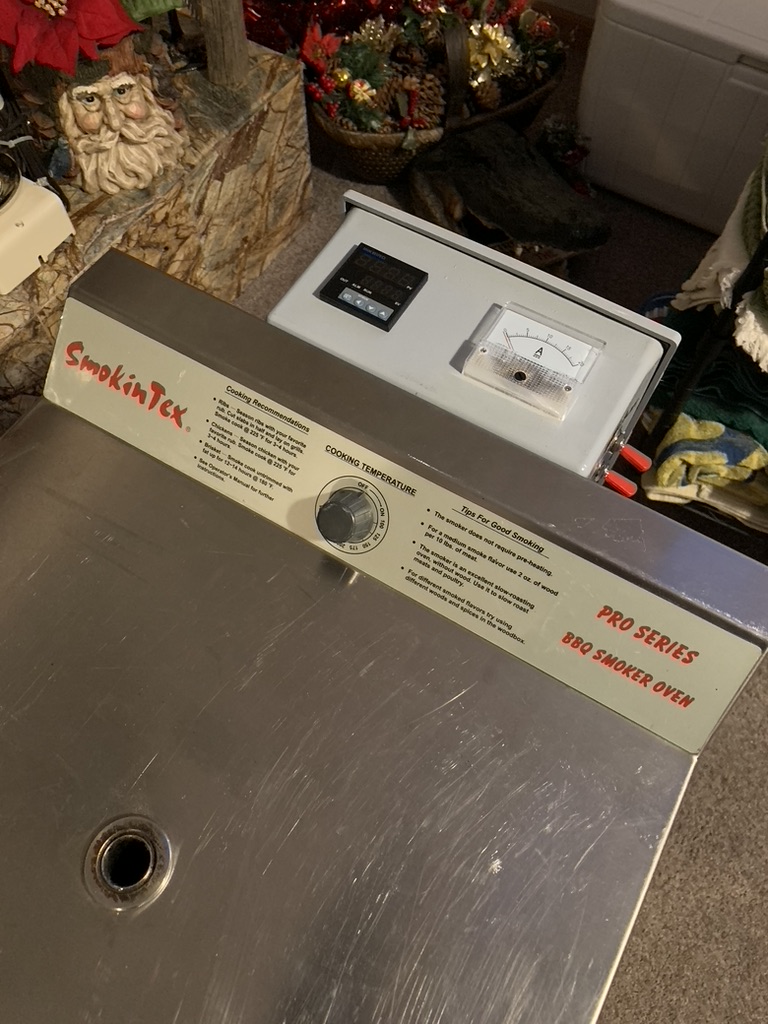
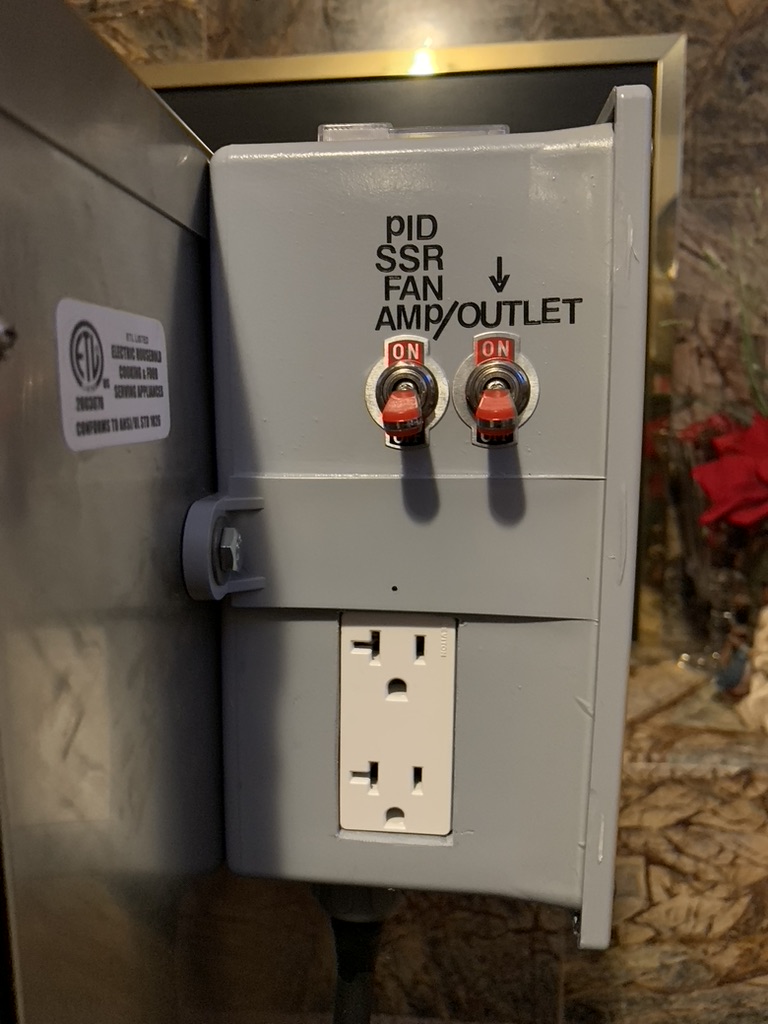
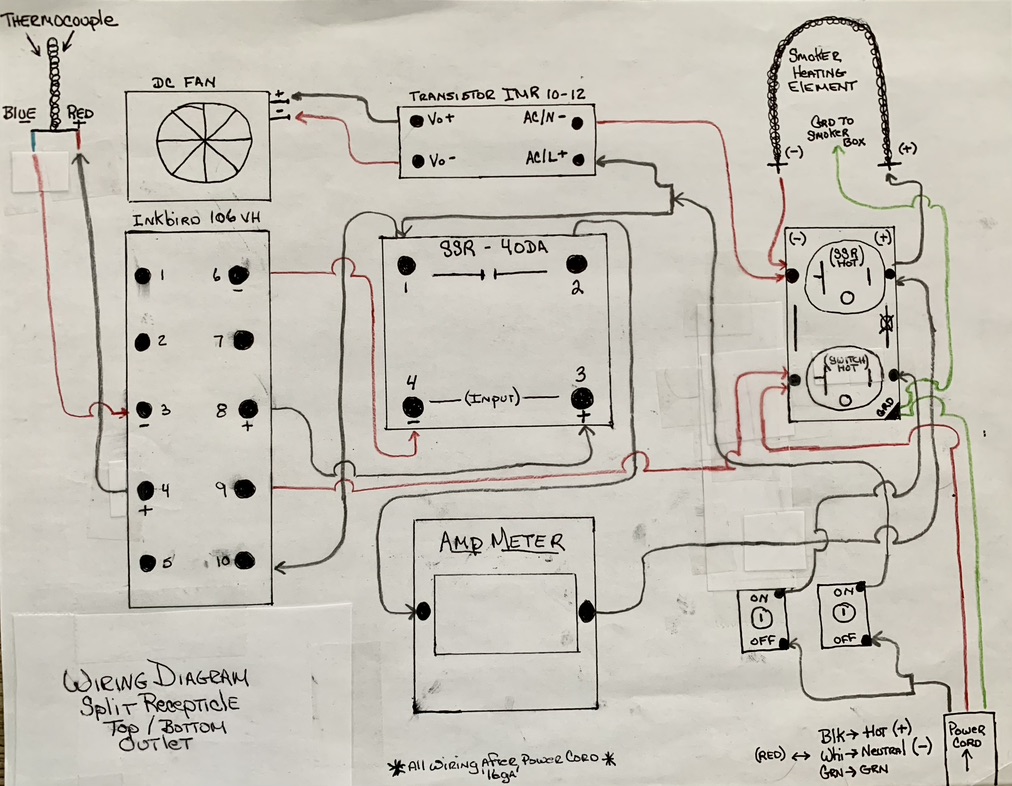
-
Lydia says… “It’s flavor is to die for”
-
Lydia says… “It’s flavor is to die for”
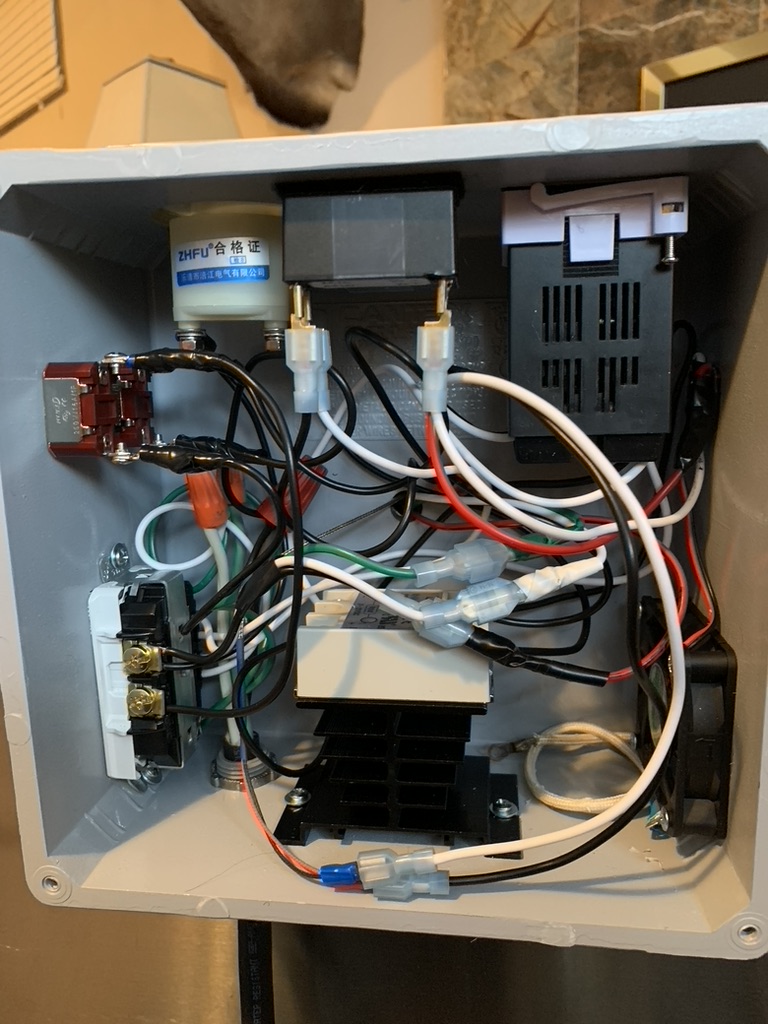
Ok, here’s a pic to show you how my DROK ammeter mod came out.
/Users/Ron/Pictures/Ron’s Photos Library.photoslibrary/resources/renders/E/EF5E40CD-1739-4CA1-AF10-5BD9016A3ACF_1_201_a.heic
-
Well that didn’t work! Not sure why sometimes I can get a pic to upload and sometimes I get shut down…
-
Well that didn’t work! Not sure why sometimes I can get a pic to upload and sometimes I get shut down…
Retired157 sometimes mine take a bit to upload. Maybe you aren’t waiting long enough?
-
My keeps saying it’s the wrong format. I do it the same way each time but just sometimes it refuses a pic. Very frustrating.
-
-
Yep… that appears to be the issue. .heic have no idea. I take a pic with my phone and that’s the format it seems to use??? looks like it wants a jpeg but how I get there from here I do not know. I’ll keep trying cause SOMEHOW I got all those other pics to work ???
-
Yep… that appears to be the issue. .heic have no idea. I take a pic with my phone and that’s the format it seems to use??? looks like it wants a jpeg but how I get there from here I do not know. I’ll keep trying cause SOMEHOW I got all those other pics to work ???
 /Users/Ron/Pictures/Ron’s Photos Library.photoslibrary/resources/derivatives/9/9A22F3F4-975B-42AB-BE81-A56BF53742CC_1_102_o.jpeg
 -
Now see… went out took another pic and presto, it worked. I don’t know.
-
My dad use to tell me when I was working on my car to get something done and couldn’t, it was because I wasn’t ‘holding my mouth right’… he may have had a point!
-
Heic format is Apple’s new “efficient” format. One of the big ios upgrades switched the default from jpg. You can switch it back in settings. For existing, will have to search for an online photo converter. There are several and some are free.
-
Heic format is Apple’s new “efficient” format. One of the big ios upgrades switched the default from jpg. You can switch it back in settings. For existing, will have to search for an online photo converter. There are several and some are free.
@bmartin1000
Thank You! You were totally correct. Went to my ‘settings’ and found exactly what you explained. So, I guess I’ll be holding my mouth ‘right’ now.

-
Retired157
/Users/Ron/Pictures/Ron’s Photos Library.photoslibrary/resources/derivatives/2/2AD9B916-BA8A-45B4-957A-2B55DB0C802E_1_102_a.jpeg
/Users/Ron/Pictures/Ron’s Photos Library.photoslibrary/resources/derivatives/B/B418E77D-E9CB-4D99-8FC1-33B7E5806CE5_1_102_a.jpeg
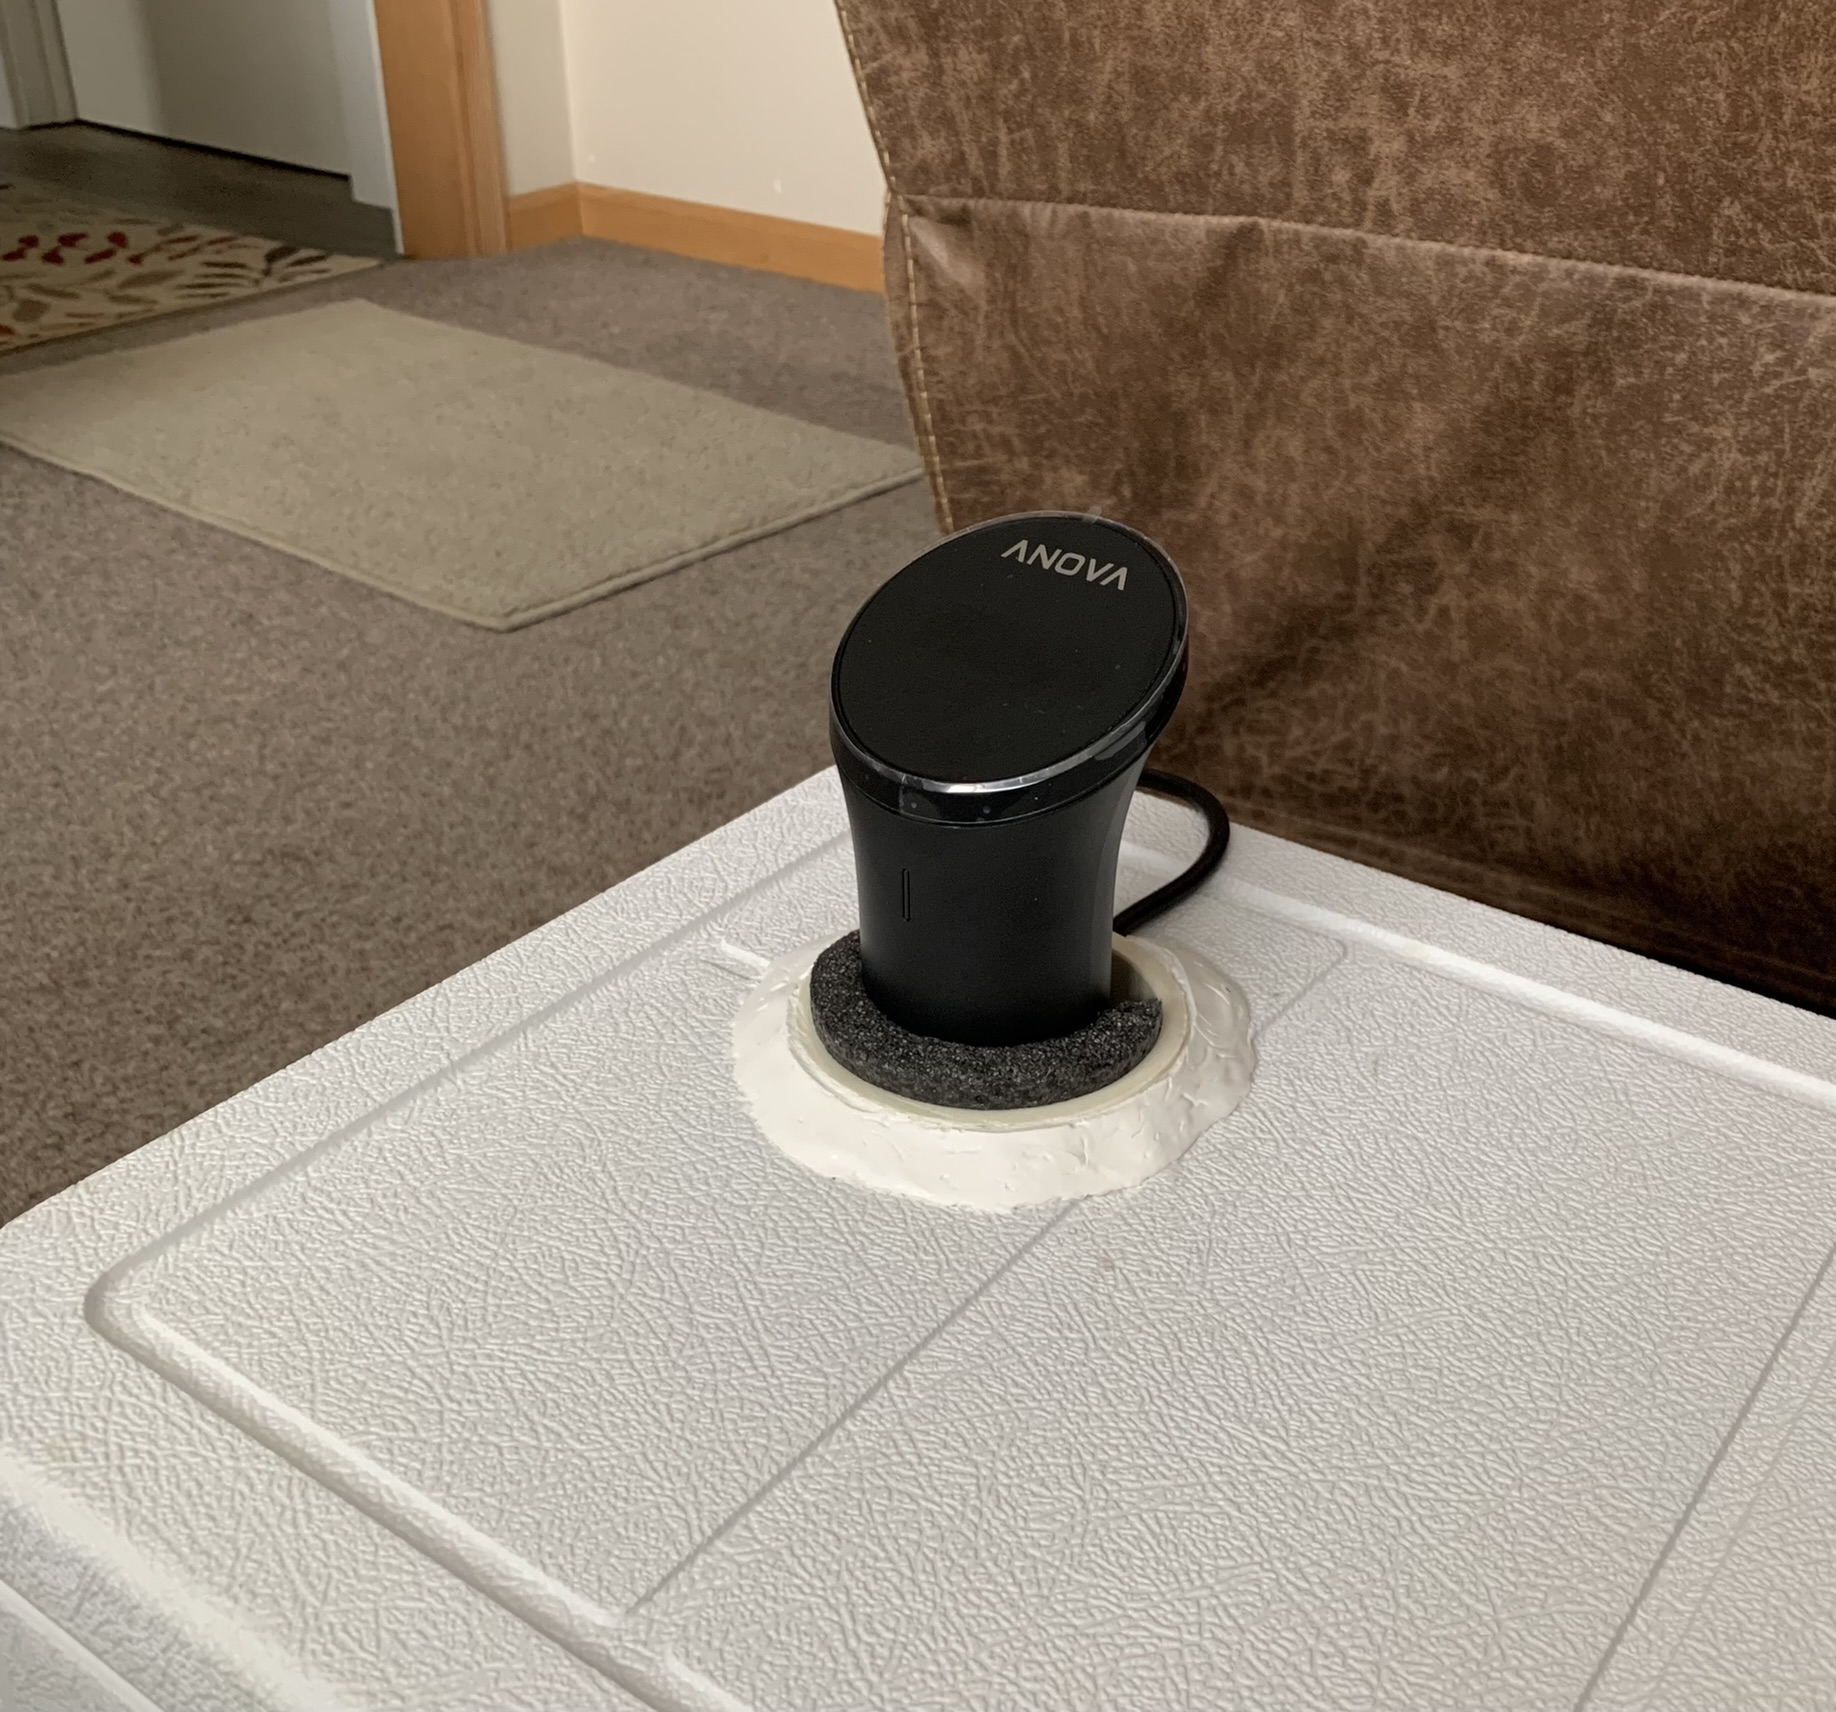
/Users/Ron/Pictures/Ron’s Photos Library.photoslibrary/resources/derivatives/3/3BCE4718-A23A-4F94-A8DD-513756A551E7_1_102_a.jpeg

/Users/Ron/Pictures/Ron’s Photos
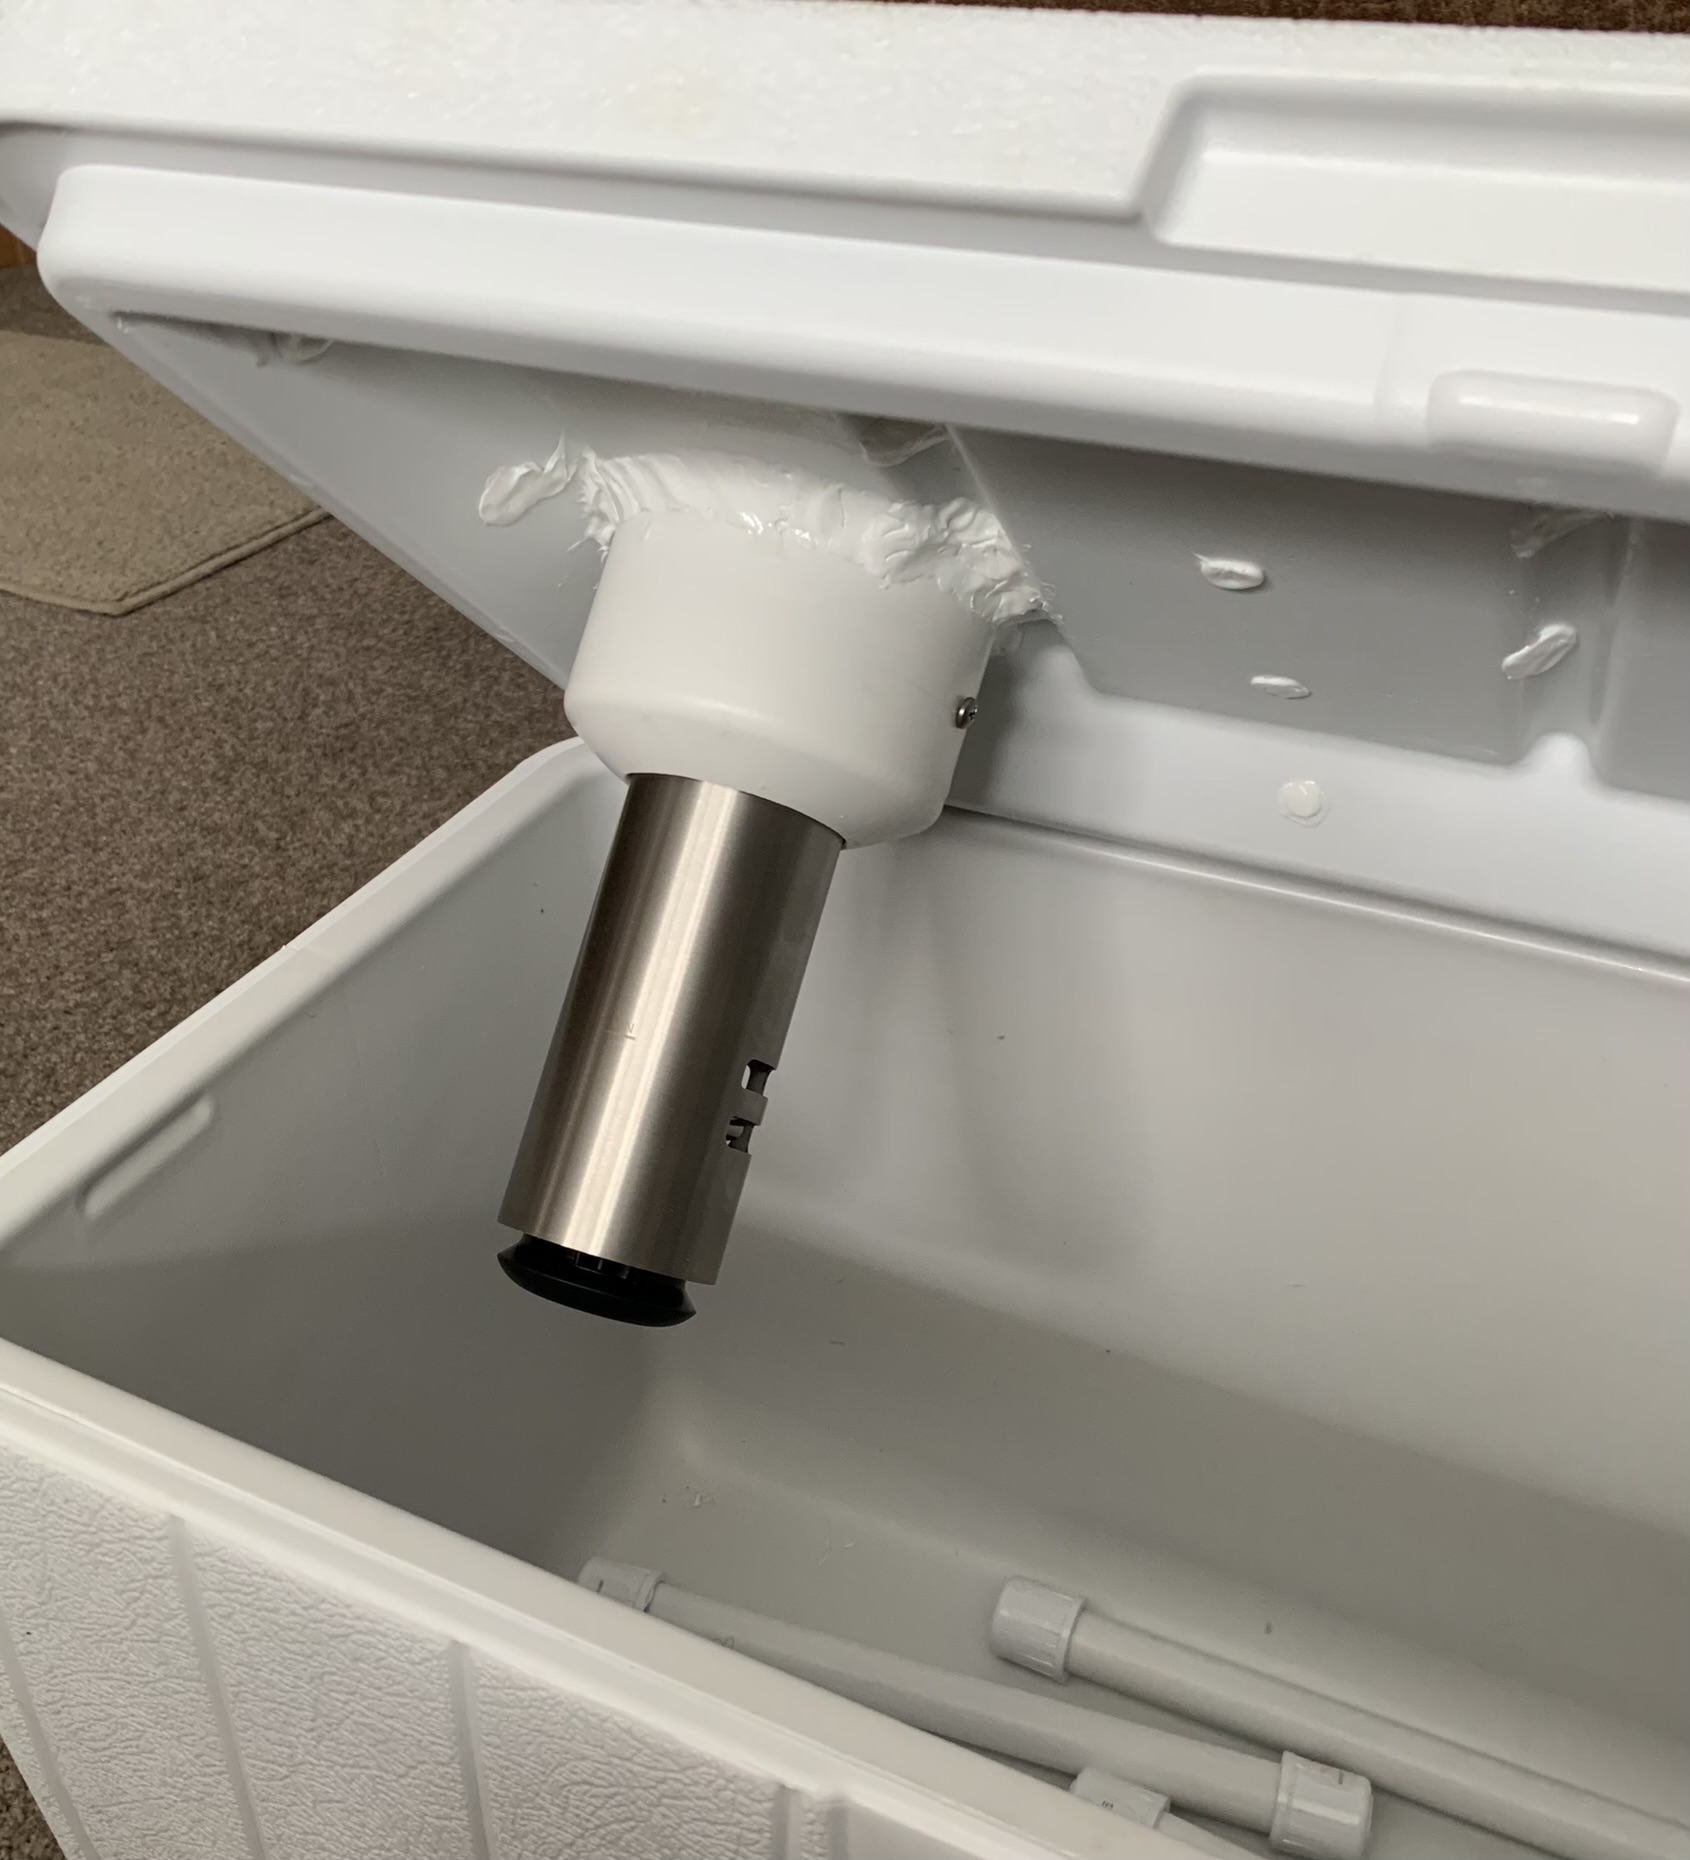
/Users/Ron/Pictures/Ron’s Photos Library.photoslibrary/resources/derivatives/1/17947B7E-44BB-408F-B8E2-C3098D09DBC3_1_102_a.jpeg
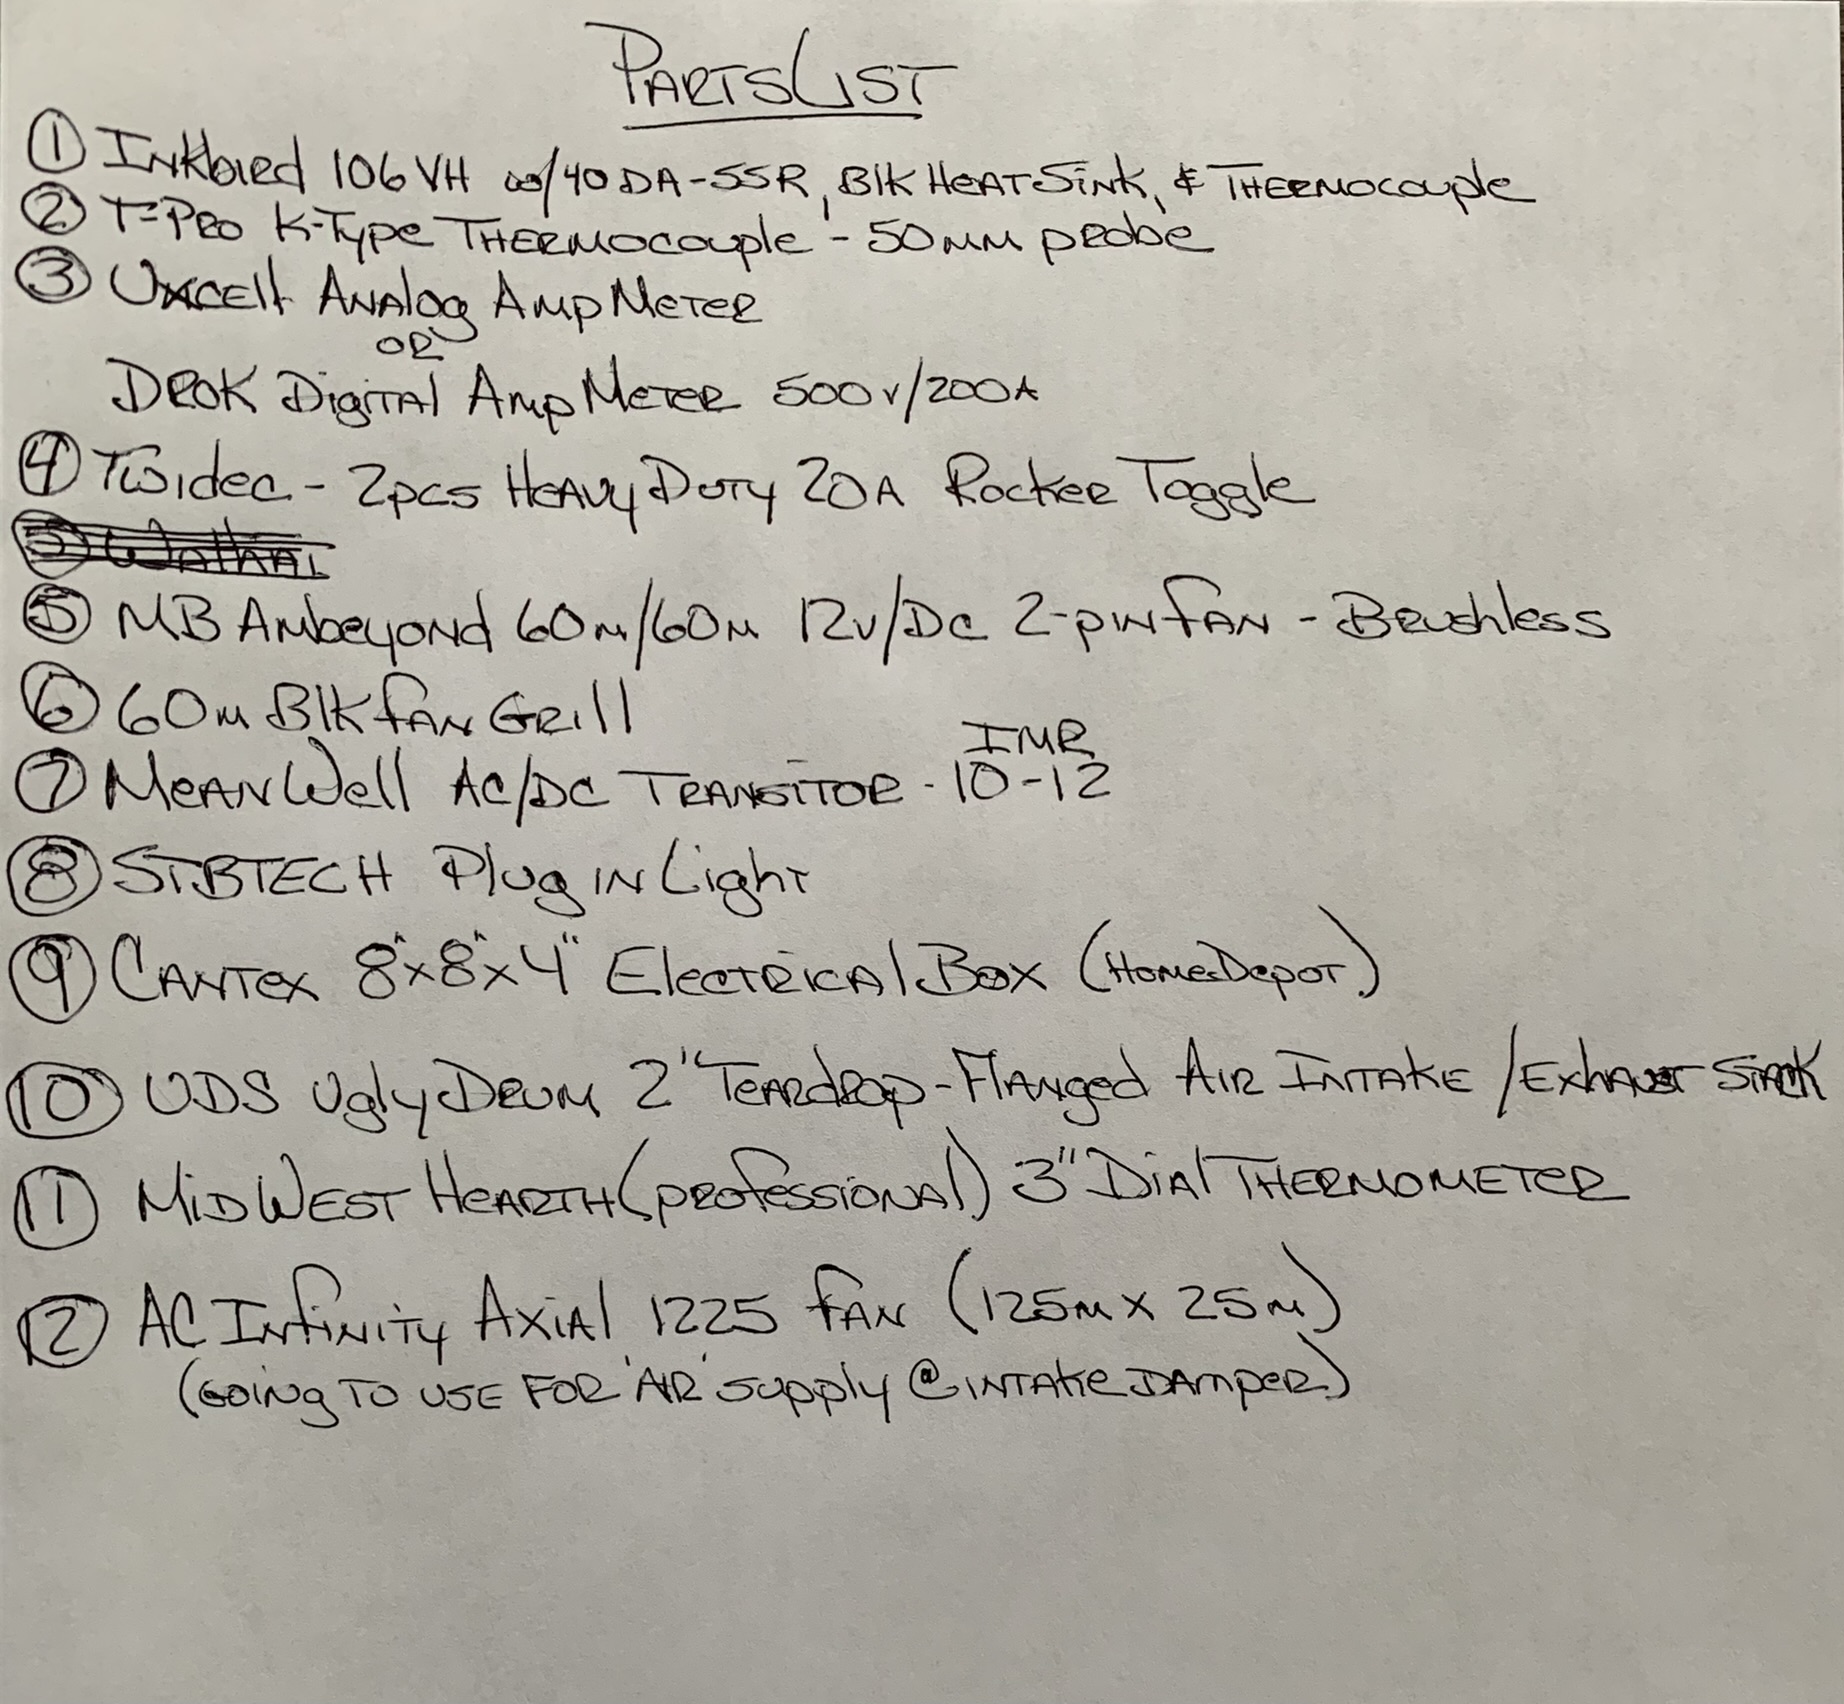
/Users/Ron/Pictures/Ron’s Photos Library.photoslibrary/resources/derivatives/A/AC2012FB-5B22-4645-A7FA-C0986924733E_1_102_a.jpegRetired157 Very nice details, very nice. Good to hear from someone from Great Falls as I enjoyed my stay in Great Falls immensely a few years ago when on assignment doing inspections for the refinery shutdown. Hope to get back someday soon. Enjoy that Summer Sausage.
-
Yeah… the original ammeter with its ‘swing arm’ display wasn’t really ‘sensitive’ enough to ‘see’ what was going on. It was barely moving… not what I was wanting ‘to see’. The DROK, with its digital display to one position ‘right’ of the decimal point, gave me an easy ‘visual’ to see with respect to the amperage being used. Once again… is it required; maybe not. However, my goal was to be able to monitor this and with the DROK, I am now satisfied I fulfilled that ‘expectation’.
Hey, I just did a ‘dry’ run… nothing at all in the box. I think you were the one who told me early on that ‘controlling’ the internal temps of the smoker was actually easier with the ‘product’ inside; during an actual cooking process. So, I figure it I am happy (totally) with my PID upgrade during a dry run test, it can only get better from there.
Retired157 great post thanks for sharing it with us.
-
Retired157 Very nice details, very nice. Good to hear from someone from Great Falls as I enjoyed my stay in Great Falls immensely a few years ago when on assignment doing inspections for the refinery shutdown. Hope to get back someday soon. Enjoy that Summer Sausage.
Yep, came to Great Falls in 1979 and haven’t yet found a reason to leave. It’s one of those ‘Last Best Places’ secrets… and I like it that way. Find the time, come back… you just might stay.
-
Yep, came to Great Falls in 1979 and haven’t yet found a reason to leave. It’s one of those ‘Last Best Places’ secrets… and I like it that way. Find the time, come back… you just might stay.
Retired157 I would have stayed in a heart beat. In fact the company wanted me to come off my own thing deal & go to work for them (that caught me by surprise, but I enjoy running my own shop too). Margaret just cannot imagine herself in the cold though. I know it is cold up there (hot too believe it or not). but it is different than down here & does not soak into the bones so much with the lesser humidity. I truly enjoyed it & hope to get back up before long & give Margaret a taste of it.
-
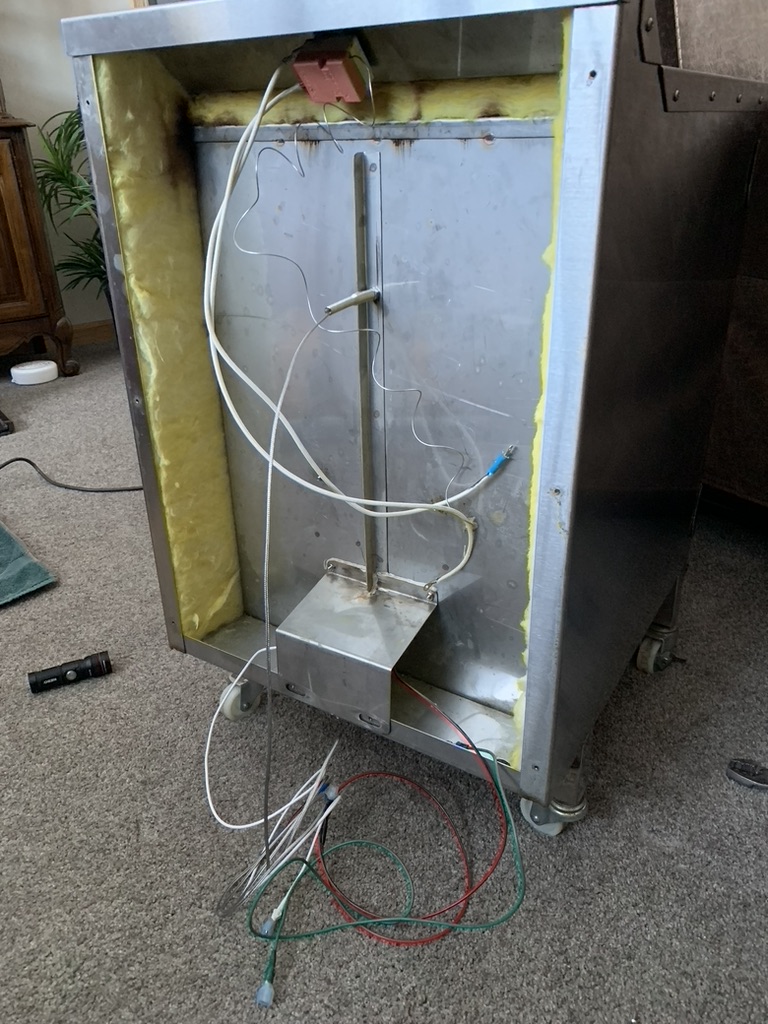
Hey everyone… thought I’d give you an ‘update’ as to where I am now, Jan. 14th, in my effort to begin making Summer Sausage. First, I gave my ‘upgraded’ smoker a bit of a test run two days ago in the garage. I put it through an ‘empty’ test using the times & temperatures of the cooking/smoking schedule I plan on using. Dang guys & gals, that PID thing really does work as advertised. That said, I did ‘learn’ a couple of things during this test. One, the ammeter (the annalog one as pictured with the ‘swing arm’) I originally had installed really did not work the way I had envisioned it would. I subsequently changed it out for the other option I included in my ‘parts list’… the DROK Digital 500v - 200a unit. Just a note here, the change was very easily done and required almost no effort on my part or any furthering of my electrical skills or knowledge… yes; even a caveman can do it. The DROK was EXACTLY what I was wanting and needing; it fulfilled what I was looking to accomplish. It’s ‘fun’ watching everything now ‘working’.
The next thing the test taught me was this; the damper (stack) that I installed on the door of my smoker is ABSOLUTELY a MUST. I learned very quickly that the PID ‘needed’ me to ‘move the air in & through’ the smoker so-as to allow the PID to maintain a ‘consistent’ internal box temperature. Once again, the ‘fix’ was soooo easy to incorporate into my procedure. All I did was grab a small fan out of my spare bedroom and locate it directly in front of the damper (about a foot away). Then, with a few adjustments of the damper’s ‘open & close’ lid, the PID using its internal ‘brain’ (don’t ask me), was able to in about 10 minutes get to and maintain any temperature I programmed in. Hey, I can see why those who have gone the PID route ‘swear’ by it!Yesterday I ordered all my spices & additives from Walton’s. So, where am I… dang near ready to take a swing at making SS! I did ‘discover’ something yesterday about ingredients and more specifically the ‘pork fat’ needed (I’m using deer/elk burger as my primary ‘meat’). I’ve read a lot of ‘posts’ about just ‘where’ to come up with pork fat. I spent some time yesterday driving around town checking with our local food chain stores and the two butcher shops here only to be disappointed. Bottomline, finding ‘pork fat’ is as close to impossible as I care to come! Not that I want to age myself, but as a kid, I remember my mom & grandma both using ‘Fat Back’ when cooking… I was on a mission now to ‘make it happen’. After a little research on-line, I came up with the solution! If you want REAL ‘Fat Back’, simply look up the site DeBragga out of New York. You can order the BEST (award winning) Fat Back directly from them. Yes, I ordered four packages (2lb ea) from them. They are easy to work with and lots of fun to talk to. Ask for Lydia… she’s a hoot and a full blown chef! Yes, there is a shipping cost involved… overnight FedEx @$49.95. To me… it’s the cost of getting the best. If I had another ‘smoker’; here in Great Falls, we could make one order and cut the shipping ‘in half’… something to think about.
Ok, you are now caught up. I’ll send more pics of the changes I made to my smoker when I actually ‘run’ my first 10lbs of SS. I’m getting there!
Thanks to everyone!
Retired157 Great to hear your progress and look forward to seeing your success with SS. Keep us posted.
-
Retired157 Great to hear your progress and look forward to seeing your success with SS. Keep us posted.
So, as was sitting here this morning, I decided that a good use of my time as I am waiting for all my ‘ingredients’ to arrive, would be to generate a document for myself that would GUIDE me through the ‘How To’ of the process I am using to make Summer Sausage. Now the first thing I should explain is that some… many… ok, maybe all of my friends say that I have a case of OCD; something I vehemently deny! Here’s what I’ve come up with. If anyone sees something that I have totally ‘screwed’ up, please let me know now. Many of you will recognize the fact that I tried to use a lot of the tips from this site and the MEATGISTIC folks and their videos.
Note Here… Walton’s was ‘Out of Stock’ on their Sure Gel Binder so I am in a bit of a waiting pattern for that.
Summer Sausage
‘The Process’Ingredients…
10lbs of meat
H-Summer
Sure Gel Binder
Sure Cure
Encapsulated Citric Acid (accelerator)
High Temp CheeseWater… 2 pints of water (=’s 2 lbs) per 25 lbs. 2 pints =’s 32 ounces
32oz’s divided by 25 lbs =’s 1.28 ounces per pound of meat
-10 lbs/meat x’s 1.28oz’s =’s 12.8 ounces of water… or .8 poundsFibrous Casings / Pre-Stuck… remember to soak in warm water for 30min’s to an hour BEFORE stuffing
Grinding of Meat…
Use a 80% to 20% ratio of ‘meat’ (deer/elk) to pork (Fat Back)… 8lbs of meat and 2lbs of Fat Back for a total of 10 lbs of meat.
Grind meat twice… first with 3/8” (10mm) plate - second with 1/8” (3mm) plate. Remember to ‘lube/oil’ your plates & cutting knives. Be sure to cool all your grinding ‘parts’ in the freezer for several hours BEFORE beginning the overall process of grinding your meat. Your meat needs to be ‘very’ cold… near freezing.
Mixing…
Objective here is to get ‘High Protein Extraction’… get the meat Tacky/Sticky - Squeeze & Mix Method
*H-Summer (per pound) = .9oz (2 tbsps)
-10 lbs x .9 =’s 9 ounces (18 tbsp’s)*Sure Gel Binder (per pound) = 2 tsp
-10 lbs x 2 tsp’s = 20 tsp’s (3.33 ounces)*Sure Cure (per pound) = 1/4 tsp
-10 lbs x 1/4 tsp = 2 1/2 tsp’s (.41 ounces)
Can be mixed with/in the water*Encapsulated Citric Acid (per pound) = 1 tsp
-10 lbs x 1 tsp = 10 tsp’s (1.66 ounces)
LAST 45 seconds of mixing*High Temp Cheddar Cheese (per pound) = 1 pound
-1 pound of cheese for every 10 lbs of meat
LAST 45 seconds of mixingStuffing…
Fibrous Casings / Pre-Stuck… soak in warm water prior to use
Load Stuffer AVOIDING air pockets
Stuff Casing FULLCooking-Smoking Schedule…
1 hr @ 115F… Drying Process - Open Vents / Air Flow - No Humidity - Smoke
1 hr @ 125F… Drying Process - Open Vents / Air Flow - No Humidity - Smoke
1 hr @ 125F… Adjusting Vents w/Air Flow - Add Humidity (water & sponges)
1 hr @ 140F… Adjusting Vents w/Air Flow - Add ‘Smoke’ w/Humidity
2 hrs @ 155F… Adjusting Vents w/Air Flow - Smoke & Humidity
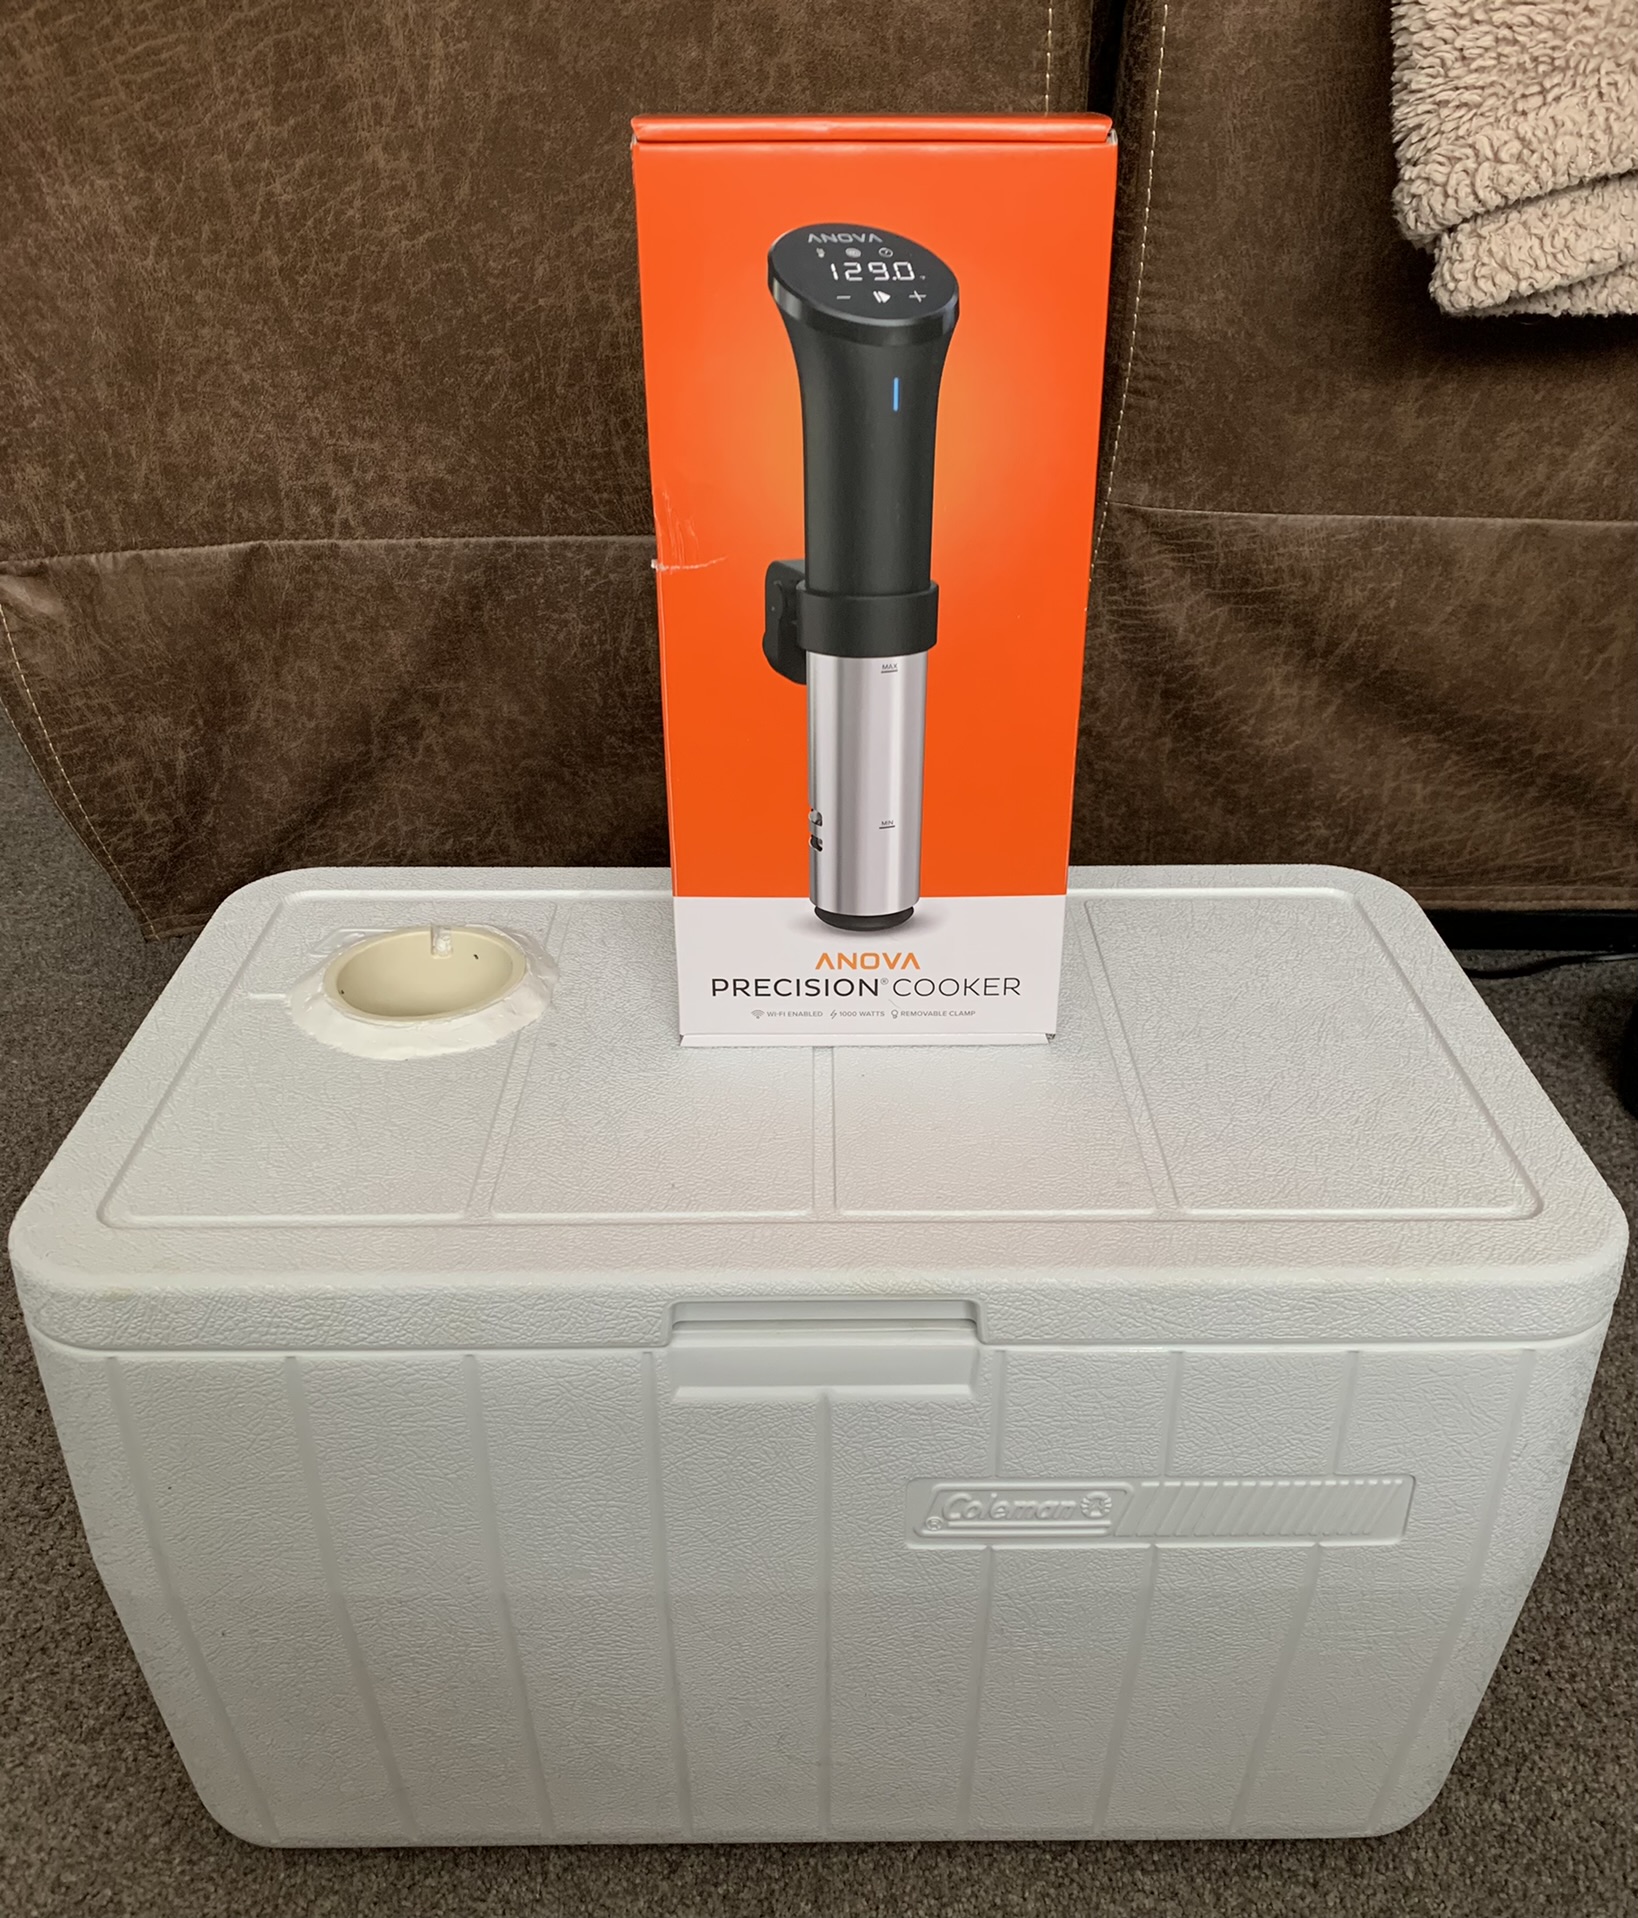
? Hrs @ 175F… Until Internal Temp of Meat Reaches 140F - Remove to Sous VideSous Vide @ 170F… Until Internal Temp of Meat Reaches 160F - Approximately 1 Hour
*Once the Summer Sausage has reached an internal temp of 160F, remove from the Sous Vide and place in an Ice Bath for 30 minutes
*Remove Summer Sausage from Ice Bath and set out at ‘Room Temperature’ for 1 hour
*After 1 hour @ Room Temperature, refrigerate the Summer Sausage ‘Over Night’
*After ‘Refrigeration’… Ready for Freezing (and eating!) - Vacuum Seal
-
So, as was sitting here this morning, I decided that a good use of my time as I am waiting for all my ‘ingredients’ to arrive, would be to generate a document for myself that would GUIDE me through the ‘How To’ of the process I am using to make Summer Sausage. Now the first thing I should explain is that some… many… ok, maybe all of my friends say that I have a case of OCD; something I vehemently deny! Here’s what I’ve come up with. If anyone sees something that I have totally ‘screwed’ up, please let me know now. Many of you will recognize the fact that I tried to use a lot of the tips from this site and the MEATGISTIC folks and their videos.
Note Here… Walton’s was ‘Out of Stock’ on their Sure Gel Binder so I am in a bit of a waiting pattern for that.
Summer Sausage
‘The Process’Ingredients…
10lbs of meat
H-Summer
Sure Gel Binder
Sure Cure
Encapsulated Citric Acid (accelerator)
High Temp CheeseWater… 2 pints of water (=’s 2 lbs) per 25 lbs. 2 pints =’s 32 ounces
32oz’s divided by 25 lbs =’s 1.28 ounces per pound of meat
-10 lbs/meat x’s 1.28oz’s =’s 12.8 ounces of water… or .8 poundsFibrous Casings / Pre-Stuck… remember to soak in warm water for 30min’s to an hour BEFORE stuffing
Grinding of Meat…
Use a 80% to 20% ratio of ‘meat’ (deer/elk) to pork (Fat Back)… 8lbs of meat and 2lbs of Fat Back for a total of 10 lbs of meat.
Grind meat twice… first with 3/8” (10mm) plate - second with 1/8” (3mm) plate. Remember to ‘lube/oil’ your plates & cutting knives. Be sure to cool all your grinding ‘parts’ in the freezer for several hours BEFORE beginning the overall process of grinding your meat. Your meat needs to be ‘very’ cold… near freezing.
Mixing…
Objective here is to get ‘High Protein Extraction’… get the meat Tacky/Sticky - Squeeze & Mix Method
*H-Summer (per pound) = .9oz (2 tbsps)
-10 lbs x .9 =’s 9 ounces (18 tbsp’s)*Sure Gel Binder (per pound) = 2 tsp
-10 lbs x 2 tsp’s = 20 tsp’s (3.33 ounces)*Sure Cure (per pound) = 1/4 tsp
-10 lbs x 1/4 tsp = 2 1/2 tsp’s (.41 ounces)
Can be mixed with/in the water*Encapsulated Citric Acid (per pound) = 1 tsp
-10 lbs x 1 tsp = 10 tsp’s (1.66 ounces)
LAST 45 seconds of mixing*High Temp Cheddar Cheese (per pound) = 1 pound
-1 pound of cheese for every 10 lbs of meat
LAST 45 seconds of mixingStuffing…
Fibrous Casings / Pre-Stuck… soak in warm water prior to use
Load Stuffer AVOIDING air pockets
Stuff Casing FULLCooking-Smoking Schedule…
1 hr @ 115F… Drying Process - Open Vents / Air Flow - No Humidity - Smoke
1 hr @ 125F… Drying Process - Open Vents / Air Flow - No Humidity - Smoke
1 hr @ 125F… Adjusting Vents w/Air Flow - Add Humidity (water & sponges)
1 hr @ 140F… Adjusting Vents w/Air Flow - Add ‘Smoke’ w/Humidity
2 hrs @ 155F… Adjusting Vents w/Air Flow - Smoke & Humidity
? Hrs @ 175F… Until Internal Temp of Meat Reaches 140F - Remove to Sous VideSous Vide @ 170F… Until Internal Temp of Meat Reaches 160F - Approximately 1 Hour
*Once the Summer Sausage has reached an internal temp of 160F, remove from the Sous Vide and place in an Ice Bath for 30 minutes
*Remove Summer Sausage from Ice Bath and set out at ‘Room Temperature’ for 1 hour
*After 1 hour @ Room Temperature, refrigerate the Summer Sausage ‘Over Night’
*After ‘Refrigeration’… Ready for Freezing (and eating!) - Vacuum Seal
Retired157 Very good, All in one place.
-
So, as was sitting here this morning, I decided that a good use of my time as I am waiting for all my ‘ingredients’ to arrive, would be to generate a document for myself that would GUIDE me through the ‘How To’ of the process I am using to make Summer Sausage. Now the first thing I should explain is that some… many… ok, maybe all of my friends say that I have a case of OCD; something I vehemently deny! Here’s what I’ve come up with. If anyone sees something that I have totally ‘screwed’ up, please let me know now. Many of you will recognize the fact that I tried to use a lot of the tips from this site and the MEATGISTIC folks and their videos.
Note Here… Walton’s was ‘Out of Stock’ on their Sure Gel Binder so I am in a bit of a waiting pattern for that.
Summer Sausage
‘The Process’Ingredients…
10lbs of meat
H-Summer
Sure Gel Binder
Sure Cure
Encapsulated Citric Acid (accelerator)
High Temp CheeseWater… 2 pints of water (=’s 2 lbs) per 25 lbs. 2 pints =’s 32 ounces
32oz’s divided by 25 lbs =’s 1.28 ounces per pound of meat
-10 lbs/meat x’s 1.28oz’s =’s 12.8 ounces of water… or .8 poundsFibrous Casings / Pre-Stuck… remember to soak in warm water for 30min’s to an hour BEFORE stuffing
Grinding of Meat…
Use a 80% to 20% ratio of ‘meat’ (deer/elk) to pork (Fat Back)… 8lbs of meat and 2lbs of Fat Back for a total of 10 lbs of meat.
Grind meat twice… first with 3/8” (10mm) plate - second with 1/8” (3mm) plate. Remember to ‘lube/oil’ your plates & cutting knives. Be sure to cool all your grinding ‘parts’ in the freezer for several hours BEFORE beginning the overall process of grinding your meat. Your meat needs to be ‘very’ cold… near freezing.
Mixing…
Objective here is to get ‘High Protein Extraction’… get the meat Tacky/Sticky - Squeeze & Mix Method
*H-Summer (per pound) = .9oz (2 tbsps)
-10 lbs x .9 =’s 9 ounces (18 tbsp’s)*Sure Gel Binder (per pound) = 2 tsp
-10 lbs x 2 tsp’s = 20 tsp’s (3.33 ounces)*Sure Cure (per pound) = 1/4 tsp
-10 lbs x 1/4 tsp = 2 1/2 tsp’s (.41 ounces)
Can be mixed with/in the water*Encapsulated Citric Acid (per pound) = 1 tsp
-10 lbs x 1 tsp = 10 tsp’s (1.66 ounces)
LAST 45 seconds of mixing*High Temp Cheddar Cheese (per pound) = 1 pound
-1 pound of cheese for every 10 lbs of meat
LAST 45 seconds of mixingStuffing…
Fibrous Casings / Pre-Stuck… soak in warm water prior to use
Load Stuffer AVOIDING air pockets
Stuff Casing FULLCooking-Smoking Schedule…
1 hr @ 115F… Drying Process - Open Vents / Air Flow - No Humidity - Smoke
1 hr @ 125F… Drying Process - Open Vents / Air Flow - No Humidity - Smoke
1 hr @ 125F… Adjusting Vents w/Air Flow - Add Humidity (water & sponges)
1 hr @ 140F… Adjusting Vents w/Air Flow - Add ‘Smoke’ w/Humidity
2 hrs @ 155F… Adjusting Vents w/Air Flow - Smoke & Humidity
? Hrs @ 175F… Until Internal Temp of Meat Reaches 140F - Remove to Sous VideSous Vide @ 170F… Until Internal Temp of Meat Reaches 160F - Approximately 1 Hour
*Once the Summer Sausage has reached an internal temp of 160F, remove from the Sous Vide and place in an Ice Bath for 30 minutes
*Remove Summer Sausage from Ice Bath and set out at ‘Room Temperature’ for 1 hour
*After 1 hour @ Room Temperature, refrigerate the Summer Sausage ‘Over Night’
*After ‘Refrigeration’… Ready for Freezing (and eating!) - Vacuum Seal
Retired157 If the wait becomes to long for the Sure Gel and you find that you need it, I have a pound here in Washington and could send you what you need to make your sausage via the postal service.




Hello! It looks like you're interested in this conversation, but you don't have an account yet.
Getting fed up of having to scroll through the same posts each visit? When you register for an account, you'll always come back to exactly where you were before, and choose to be notified of new replies (either via email, or push notification). You'll also be able to save bookmarks and upvote posts to show your appreciation to other community members.
With your input, this post could be even better 💗
Register LoginSponsored By:

