How To Make Homemade Snack Sticks

-
So I realize this isn’t about making sticks however tonight I used the Honey BBQ Snack Stick Seasoning (using the 2lb conversion ratio) to make burgers topped with provolone cheese… AMAZING!!!

keoni02
Interesting. Sounds good. -
So I realize this isn’t about making sticks however tonight I used the Honey BBQ Snack Stick Seasoning (using the 2lb conversion ratio) to make burgers topped with provolone cheese… AMAZING!!!
keoni02 Sounds good and looks good. I’ve used the mild Italian sausage seasoning for burgers
 and man was that a big hit around my house. Have a great day.
 -
I realize there are variables that will cause cooking times to vary but can you give me a ballpark idea of how long it takes the sticks to reach 160 deg at the 175 deg setting at the end? I’m trying to plan how much time I will need to complete the cooking process.
-
I realize there are variables that will cause cooking times to vary but can you give me a ballpark idea of how long it takes the sticks to reach 160 deg at the 175 deg setting at the end? I’m trying to plan how much time I will need to complete the cooking process.
Dcastro that is hard to answer. There are so many variables. Type of smoker amount of water used air flow and humidity in your smoker. I use a masterbuilt and it can take anywhere from 8 to 12 hours. I know this isn’t much help. Sorry
-
First off, awesome website and awesome supplies.
Secondly, I made some venison snack sticks for the first time and was looking for some recommendations. The flavor and outside texture are on point but the inside has an odd texture and feels mushy. Below is what I did. Do you have any tips or recommendations?
3-1/2 lb of ground venison
1-1/2 lb of ground pork fat
4.5oz Willies snack stick Seasoning
0.8oz Carrot Binder
0.2oz Sure Cure
0.4oz Smoked Meat Stabilizer
6.4 oz of ice cold waterI mixed everything in a kitchenaid for about 8 mins and added the smoke meat stabilizer the last min. I used 16mm collagen casing and stuffed them with a grinder.
Is it possible that I didn’t achieve a good enough protein extraction by using a kitchenaid mixer?Would adding some pork and less pork fat help with the texture?
-
First off, awesome website and awesome supplies.
Secondly, I made some venison snack sticks for the first time and was looking for some recommendations. The flavor and outside texture are on point but the inside has an odd texture and feels mushy. Below is what I did. Do you have any tips or recommendations?
3-1/2 lb of ground venison
1-1/2 lb of ground pork fat
4.5oz Willies snack stick Seasoning
0.8oz Carrot Binder
0.2oz Sure Cure
0.4oz Smoked Meat Stabilizer
6.4 oz of ice cold waterI mixed everything in a kitchenaid for about 8 mins and added the smoke meat stabilizer the last min. I used 16mm collagen casing and stuffed them with a grinder.
Is it possible that I didn’t achieve a good enough protein extraction by using a kitchenaid mixer?Would adding some pork and less pork fat help with the texture?
tjrice15 my suggestion would be not use carrot fiber and use Sure Gel instead. Carrot Fiber has a higher water retention capacity. You can use it, but it is typically used in fresh products and Sure Gel used in cured products. I am not sure of what your cook/smoke schedule was, but if you didn’t have fat out there is a good chance your protein extraction was sufficient. The farce should be very sticky and it is unusual for most of us to over work the farce for protein extraction, the tendency is to not extract enough. Your meat to fat ratio looks okay, a little high on the fat for me. I would have gone 18oz of fat.
-
First off, awesome website and awesome supplies.
Secondly, I made some venison snack sticks for the first time and was looking for some recommendations. The flavor and outside texture are on point but the inside has an odd texture and feels mushy. Below is what I did. Do you have any tips or recommendations?
3-1/2 lb of ground venison
1-1/2 lb of ground pork fat
4.5oz Willies snack stick Seasoning
0.8oz Carrot Binder
0.2oz Sure Cure
0.4oz Smoked Meat Stabilizer
6.4 oz of ice cold waterI mixed everything in a kitchenaid for about 8 mins and added the smoke meat stabilizer the last min. I used 16mm collagen casing and stuffed them with a grinder.
Is it possible that I didn’t achieve a good enough protein extraction by using a kitchenaid mixer?Would adding some pork and less pork fat help with the texture?
tjrice15 Did you grind through a small plate twice? This can cause the meat to emulsify. I usually grind through a 3/8" and then a 1/8" (I think?). I tried to stuff using my grinder’s stuffing attachment and that also emulsified my meat. I could have been doing it wrong though.
-
tjrice15 Did you grind through a small plate twice? This can cause the meat to emulsify. I usually grind through a 3/8" and then a 1/8" (I think?). I tried to stuff using my grinder’s stuffing attachment and that also emulsified my meat. I could have been doing it wrong though.
JerkyIsMySalad Using the grinder to stuff sausage works the meat again even with no knife and only the kidney plate it will heat it up and mess with your texture. I did it that way for awhile and never got satisfactory results. I would recommend to anyone to use a stuffer in place of a grinder.
-
JerkyIsMySalad Using the grinder to stuff sausage works the meat again even with no knife and only the kidney plate it will heat it up and mess with your texture. I did it that way for awhile and never got satisfactory results. I would recommend to anyone to use a stuffer in place of a grinder.
-
YooperDog Hello fellow Yooper. Yeah I did about 1 foot of sausage and turned the grinder off. I have a stuffer but was just curious if the stuffer attachment for the grinder actually works.
JerkyIsMySalad It is not going to do the better job a stuffer will. The grinder head and accessories all need to be chilled in the freezer, the grind needs to be near freezing and it still only goes only as fast as the worm pulls it through. With all that friction things will warm up and the protein get mashed. With a stuffer it is being pushed through. The attachments work but not the best. My belief was that it was a way to justify the cost of a grinder.
-
First off, awesome website and awesome supplies.
Secondly, I made some venison snack sticks for the first time and was looking for some recommendations. The flavor and outside texture are on point but the inside has an odd texture and feels mushy. Below is what I did. Do you have any tips or recommendations?
3-1/2 lb of ground venison
1-1/2 lb of ground pork fat
4.5oz Willies snack stick Seasoning
0.8oz Carrot Binder
0.2oz Sure Cure
0.4oz Smoked Meat Stabilizer
6.4 oz of ice cold waterI mixed everything in a kitchenaid for about 8 mins and added the smoke meat stabilizer the last min. I used 16mm collagen casing and stuffed them with a grinder.
Is it possible that I didn’t achieve a good enough protein extraction by using a kitchenaid mixer?Would adding some pork and less pork fat help with the texture?
tjrice15 Are the inside fully cooked? might be case hardening.
-

How To Make Homemade Snack Sticks
Learn how to make homemade snack sticks with Walton's and Meatgistics. Watch the video, read the guide, and then post your questions or comments below
What Is A Snack Stick?
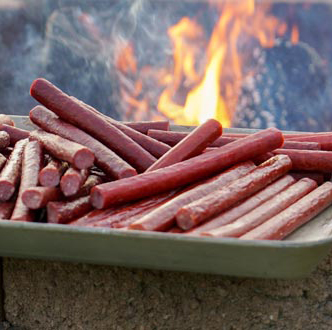
Snack Sticks are a meat snack and semi-dried sausage that are stuffed into a small diameter casing. Typically a collagen casing is used, but it is also acceptable to use natural casings or even make skinless snack sticks. Most snack sticks have a low pH from around 4.5 to 5.2, which is what gives them that familiar tangy flavor and is what helps aid in shelf stability. Another aid for shelf stability is a low water activity, which means binding water in the meat snacks to make it unavailable to support microbial growth. Water activity is not something that can be measured by a home meat processor, but we still set up our process and thermal processing to attempt to achieve a lower water activity. Snack sticks can be made from just about any type of meat, from beef, pork, chicken, other poultry, wild game, or a combination of meats. Walton’s recommends using a lean to fat ratio of at least 80/20, and many times a 30% fat ratio, with a maximum of 40% fat. Fat is where most of your flavor comes from so changing your lean to fat ratio will change the overall taste and mouthfeel of your product.
Meat Block
25lb 80/20 beef trim 1
Additives
1 package Excalibur Snack Stick Seasoning
1oz Sure Cure 2
6oz Sure Gel Meat Binder 3
4oz Encapsulated Citric Acid 4
2 to 3 lb High Temperature Cheese
19mm Collagen Casings
1 Quart Ice Cold Water 5
Process
Start the initial grind with a 3/8in (10mm) grinder plate, then grind a second time through a 1/8in (3mm) grinder plate. Always use a sharp grinder knife and plate. This will help you retain a better particle definition, color, and help prevent any smearing of the meat. If you cannot easily distinguish the lean from the fat when grinding, then it may be time for a new grinder plate and knife.
Meat Mixing
Using a meat mixer is preferred to hand mixing when making snack sticks. We need to make sure we get a lot of protein extraction, and that is a bit more difficult to achieve in hand mixing but still a possibility to do if you don’t have an actual meat mixer. We are going to want to mix for about 8 minutes, and we’ll want to reverse the direction of the mixing paddles every 1 minute. When you start the mixer, just start adding all the ingredients, except the Encapsulated Citric Acid and High Temp Cheese. These last two ingredients can be added in the last 45-60 seconds of the cycle, or just long enough to evenly disperse. Over mixing Encapsulated Citric Acid could lead to breaking the encapsulate and over mixing the cheese can lead to smearing and loss of shape.

Sausage Stuffing
Avoid creating air pockets when you load your sausage stuffer and begin stuffing until the casings are full with a smooth exterior. We will stuff into as long of ropes as we can, and then we’ll cut them to length when we actually hang on smoke sticks in the smokehouse.
Thermal Processing
For information on adding humidity to your smoke schedule go HERE
Either hang on smoke sticks or lay on racks in your smokehouse or oven. Just be sure to leave a slight gap between the snack sticks. A simple cooking schedule you can follow is here:
125F for 1 hour
140F for 1 hour
155F for 2 hours
175F until internal meat temp of 160FCooling
To help set the casing to the meat and also prevent wrinkling we need to shower the snack sticks when they are done cooking or put them in an ice water bath. It should only take around 10 minutes to get the temperature to drop down. Then, we’ll let them set out for about 1 hour before moving to the refrigerator/freezer. After we are totally done with the cooling process, then we will package in vacuum pouches for longer term storage.

Wrap up
It’s easy to get the basics on making snack sticks, but practice does make perfect. Walton’s has everything you need (except the meat) to make great snack sticks, plus we have the knowledge to help you perfect your own process. If you have any questions or need help in your process, please share your questions or comments below.
Notes
- Using a binder like Carrot Fiber, or Soy Protein Blend will not change how much water you put into your product.
- Place a small pan of water in the bottom of smokehouse during the entire cooking cycle to help increase humidity
If your smoker, smokehouse, dehydrator, or oven cannot reach temperatures as low as 125F, just start as low as possible and slowly increase the temperature over time
FootNotes
1. Or use 18 lb wild game meat and 7 lb pork fat or beef fat, though beef fat will have different texture and taste (Return to text)
2. Sure Cure packet is included with seasoning (Return to text)
3. Instead of Sure Gel also try 4 oz of Carrot Fiber (Return to text)
4. If you do not use a cure accelerator like Encapsulated Citric Acid or Smoked Meat Stabilizer, then after it has been stuffed into its casing hold in a refrigerator for approximately 12 hours or overnight (Return to text)
5. For Home Processors 2 Qts Will Make Stuffing Easier (Return to text)Watch WaltonsTV: How To Make Snack Sticks
Hi Austin,
I posted in meatgistics as well under 911. My profile is Drake.
Venison sticks,
I’m doing everything correctly, but I end up with loose chewy casings.
I have to pull casings off the sticks before packaging. Like I stated I’ve posted a full explanation under 911.
Any ideas would be very helpful






Hello! It looks like you're interested in this conversation, but you don't have an account yet.
Getting fed up of having to scroll through the same posts each visit? When you register for an account, you'll always come back to exactly where you were before, and choose to be notified of new replies (either via email, or push notification). You'll also be able to save bookmarks and upvote posts to show your appreciation to other community members.
With your input, this post could be even better 💗
Register LoginSponsored By:

